The main goal of this session is to show how researchers can use a system control version like Git through GitHub in order to improve how they keep different versions of their projects and papers. During this fully practical workshop we will review the usage of these tools from scratch. At the end of this session, attendees will learn how to save different versions of their projects and papers, compare them between different dates, recover previous versions, and handle collaborations of a project modified during months by different authors.
Prerequisites
Attendees need to perform two tasks before starting this workshop:
- Create a FREE GitHub account before starting the event from https://github.com/join.
- Install the FREE version of GitKraken and sign in using the GitHub account you created in the previous step. You can find a comprehensive tutorial here.
These tools we are going to use are free and you don’t need to pay to use them.
Introduction
A version control system is a software tool massively used by software engineers since 2002. Used to save different versions of any text-based files, compare versions between different dates, recover previous versions, or handle collaborations of a project modified during months by different authors.
During this post, we will review how researchers’ performance coding their experiments or writing papers using LaTeX could be improved thanks to the usage of a version control system named Git, a tool named GitKraken and a platform named GitHub.
As we’d like to be pragmatic, and stay focused on the research process we will try to keep this workshop simple using just one tool. We will not review any software based on a terminal or commands so any researcher could easily follow this workshop. You’ll just need your laptop!
The following sections describe the steps needed to start versioning your own paper step by step and start making versioned changes.
Vocabulary
Before starting, there are some terms we need to review. These terms are all related to the usage of Git or GitHub:
- Repository: Project we want to version.
- Commit: A point of the history we want to save.
- History: Set of commits sorted by date I can use to move around.
- Branch: A different evolution of my project.
But don’t you worry, we will review the meaning and the usage again in the following sections.
Create a GitHub account
GitHub accounts are needed if we want to keep our projects safe and keep a free backup of them. You can create your own account from https://github.com
Remember that if you a university member you can get a student developer pack for free and use GitHub private repositories when needed. During this workshop we won’t need this feature, but it could be useful for you in the future:
Download and install GitKraker
In order to handle our repository from a friendly user interface, we will need to install an application named GitKraken. This tool is the application we will use during the following sections in order to facilitate the usage of Git. You can easily download it and install it from this link.
Once installed, you can create your first GitHub repository from this screen:
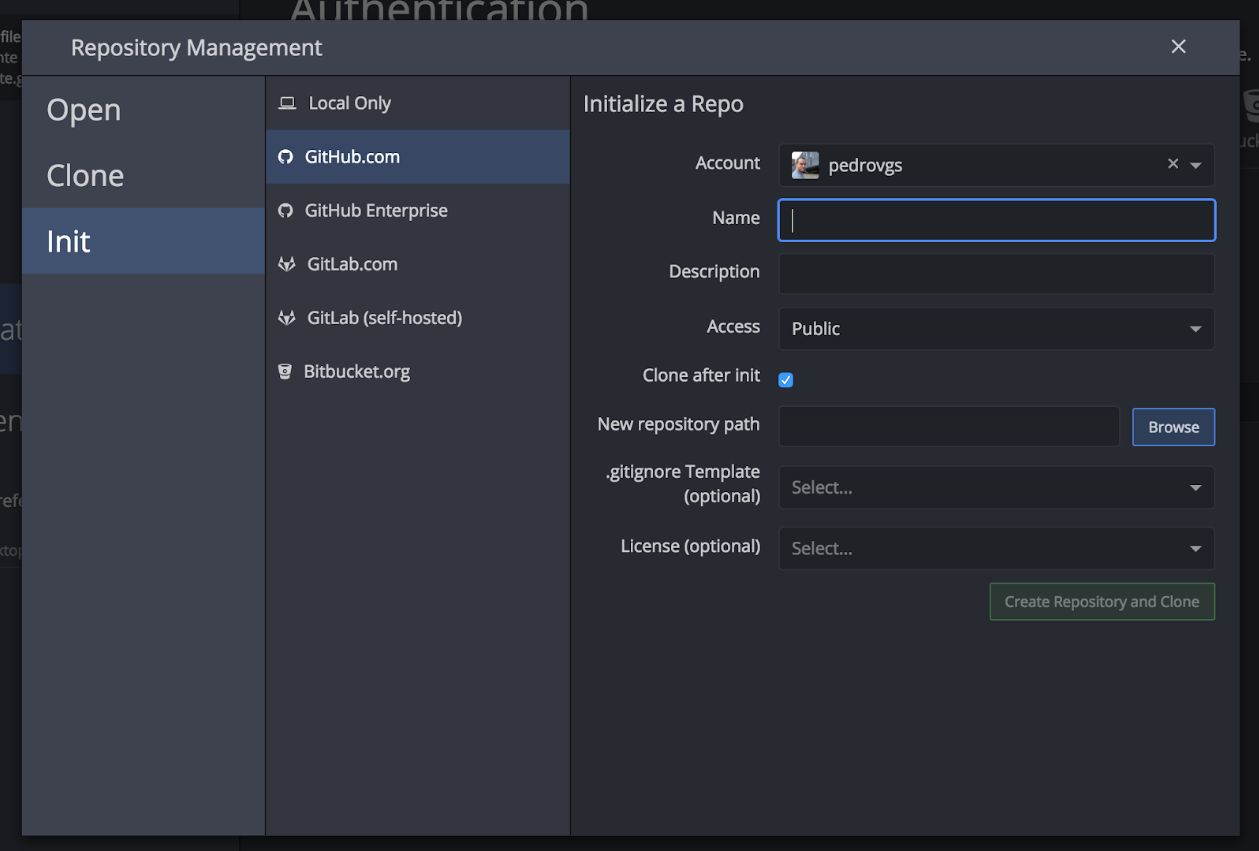
This will generate a GitHub repository for you and a local folder where you can start working using any text-based content.
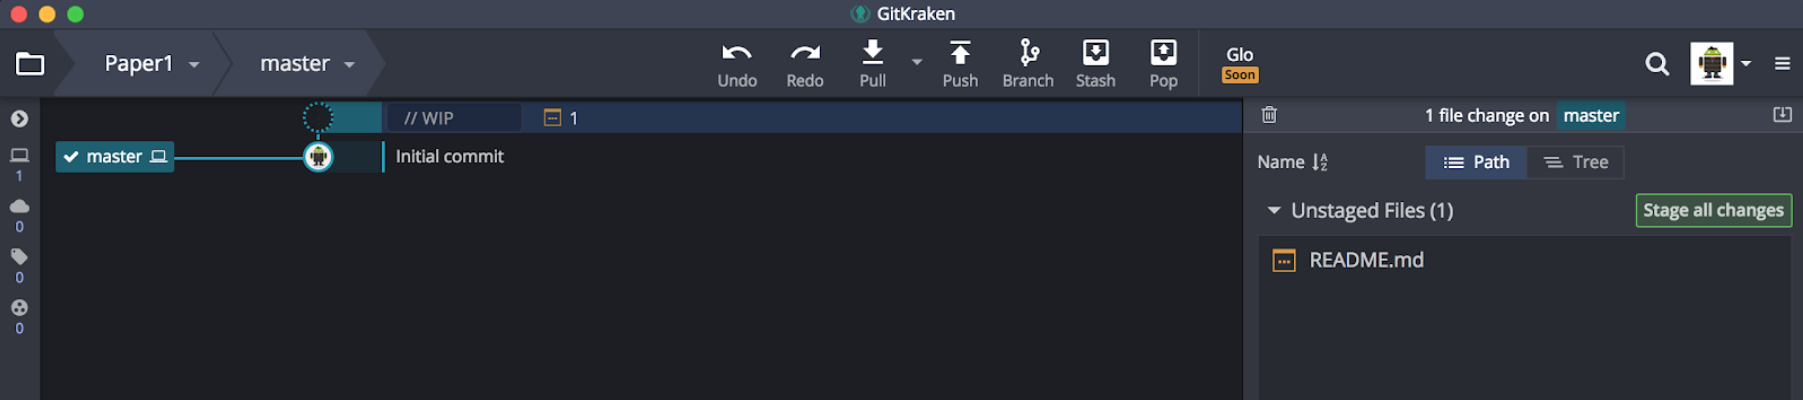
This is what you should see once the repository is created:

Now we are ready to add new content to our repository and start adding commits!
Making our first change
Once the repository is created and initialized properly, you the README.md file. The README.md file can be found inside the root folder. Add the following content to the already mentioned file:
# Paper 1: <The title of your paper>
### Author: <Your name and the name of your collaborators>
### Topic: <What’s the paper about>
### Start date: 1st of March, 2018.
If you find any content inside this README.md file, delete it before adding our modifications.
After saving your changes you can open GitKraken and you should see something like this:
As you can see, the user interface shows that there are unstaged files. If you click on the file named README.md you should see the changes you’ve added to the file:
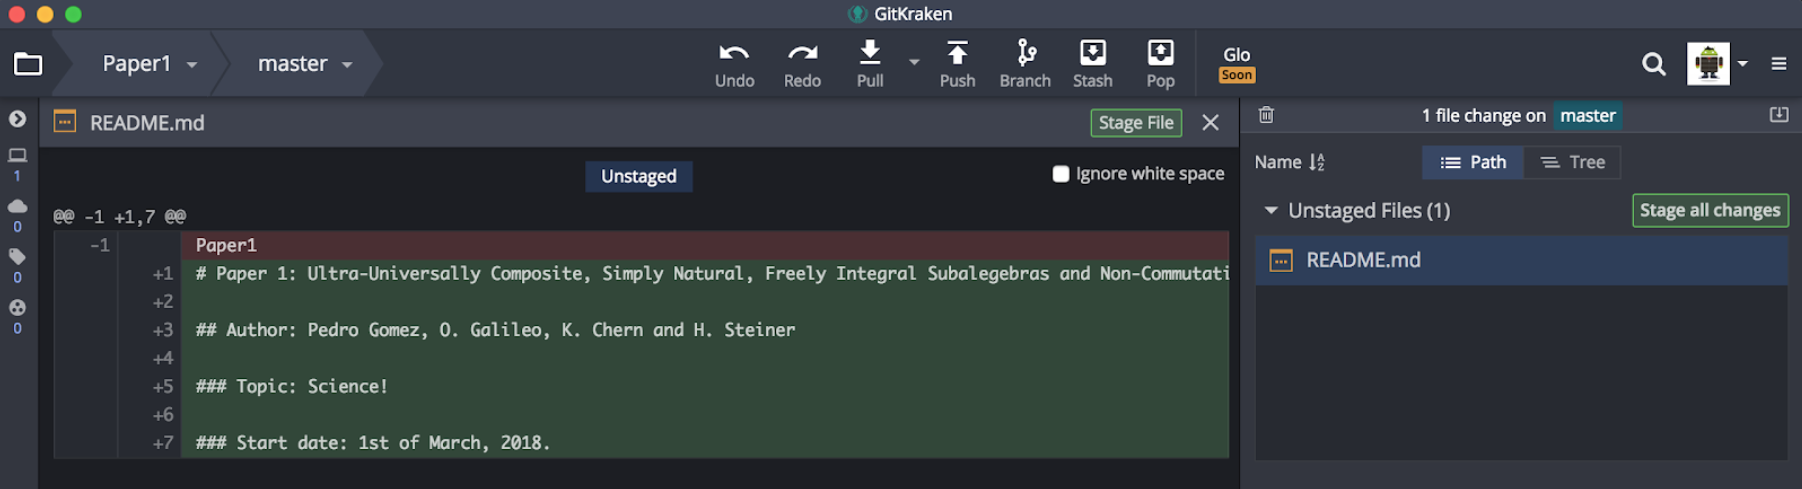
As you can see, the content we added previously is now marked in green and the content we’ve deleted is marked in red. These colors will be used always to indicate changes in a file when adding or deleting content.
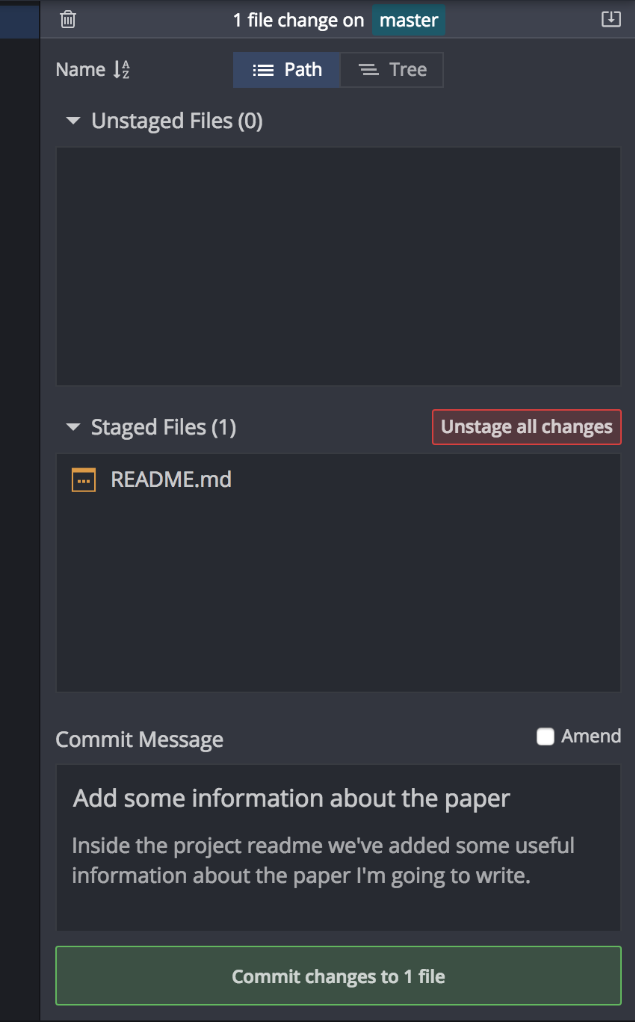
Now we are ready to commit our changes. A commit is a point in the history of our repository that we will save for the future. We could come back to this point of the repository history if needed in the future. In order to make your first commit you just need to add a message and press the Commit changes green button:
After making your first commit you should see how the repository now shows a new moment in the history that we can review when needed:
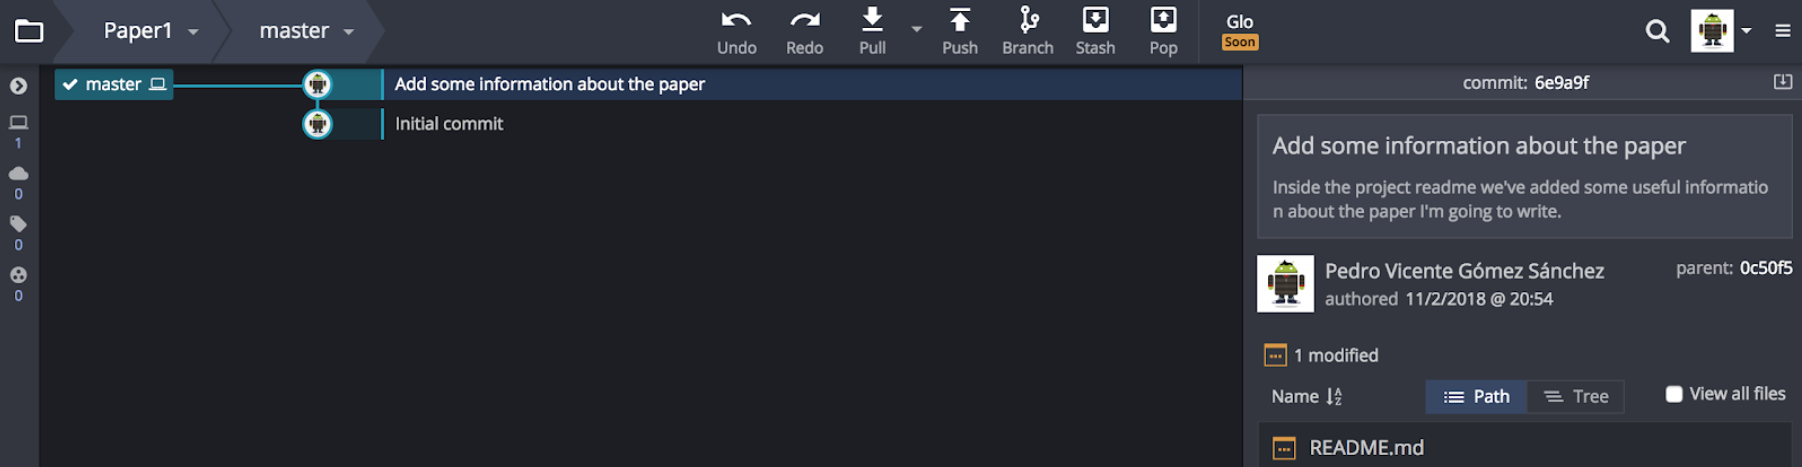
The message you wrote will be attached to the commit we just made.
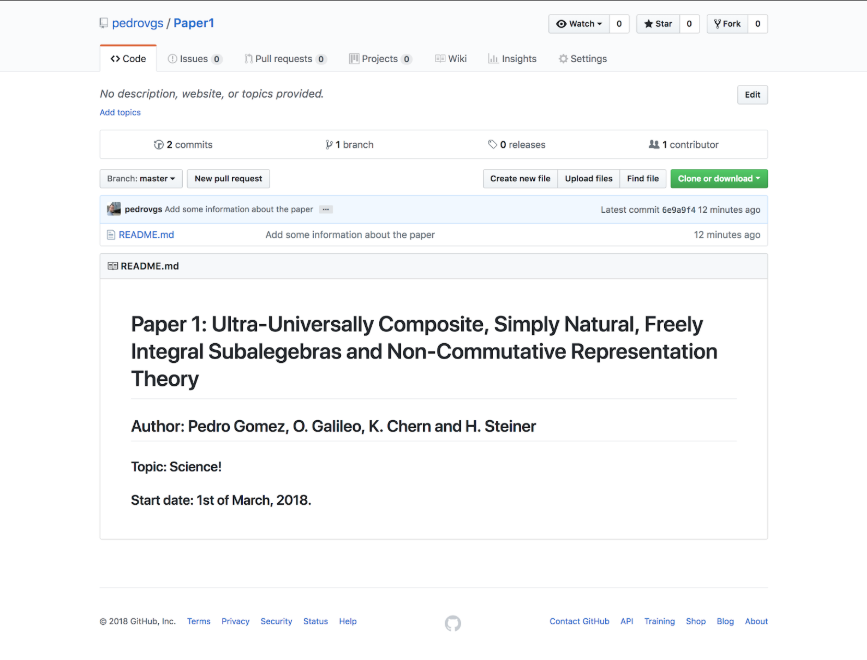
Pushing your commits to GitHub will ensure the content is saved in the cloud and you always have a backup. Don’t forget to push after commit if you want to save your changes.

After pushing your commits, you’ll see how the GitHub repository now reflect your changes.
Reverting a commit
Reverting a change we made in the past is quite common, we can easily do this from GitKraken just by clicking on the history screen with the right click of your mouse. Select the commit you want to revert and using the right button click on Revert commit.
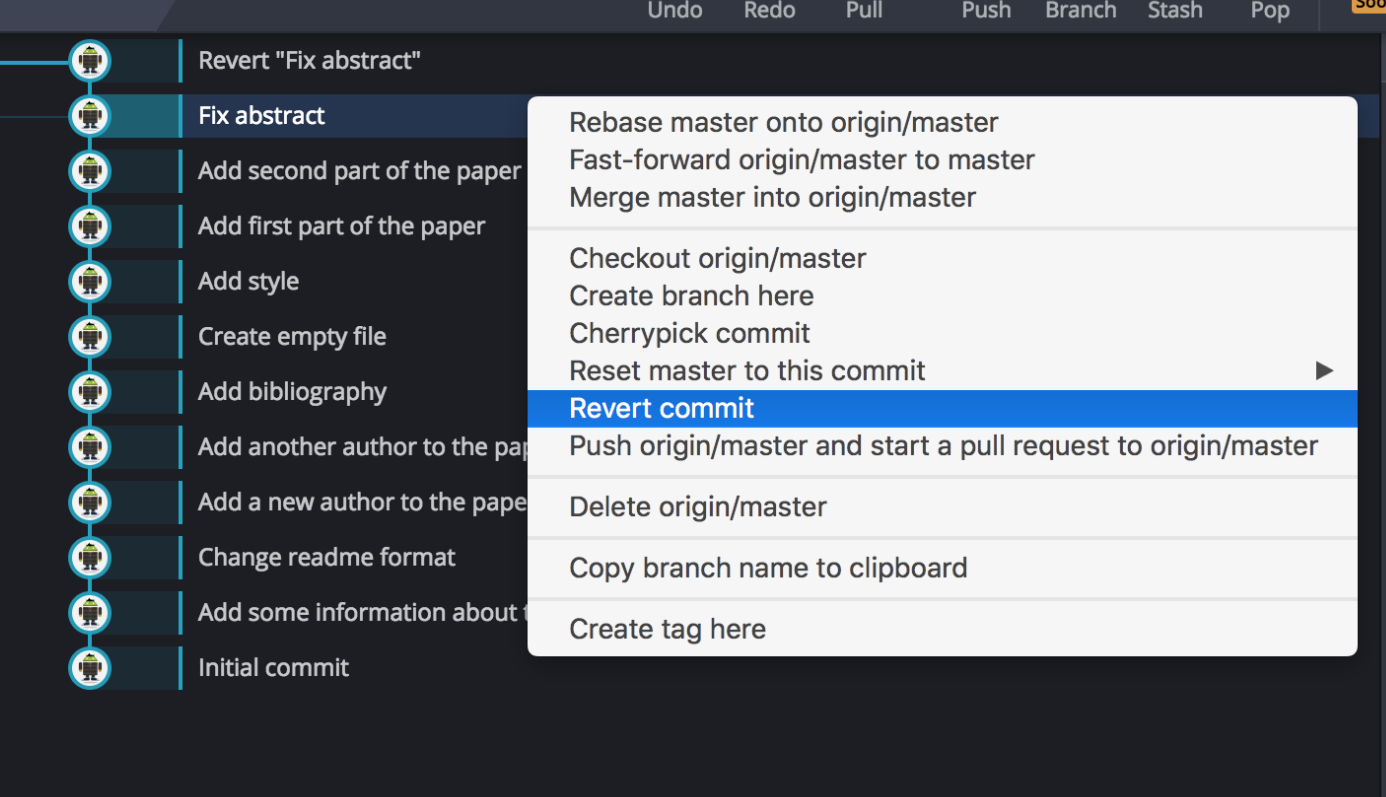
This will generate a new commit in the repository history reverting the changes you selected. Remember to push your changes if you want to sync your local repository with the GitHub repository.
Back to the past
As our repository is based on different commits and every commit represents a point in the history. We can easily go back to the past just by selecting a commit from GitKraken, clicking on the right button and selecting Create branch here.
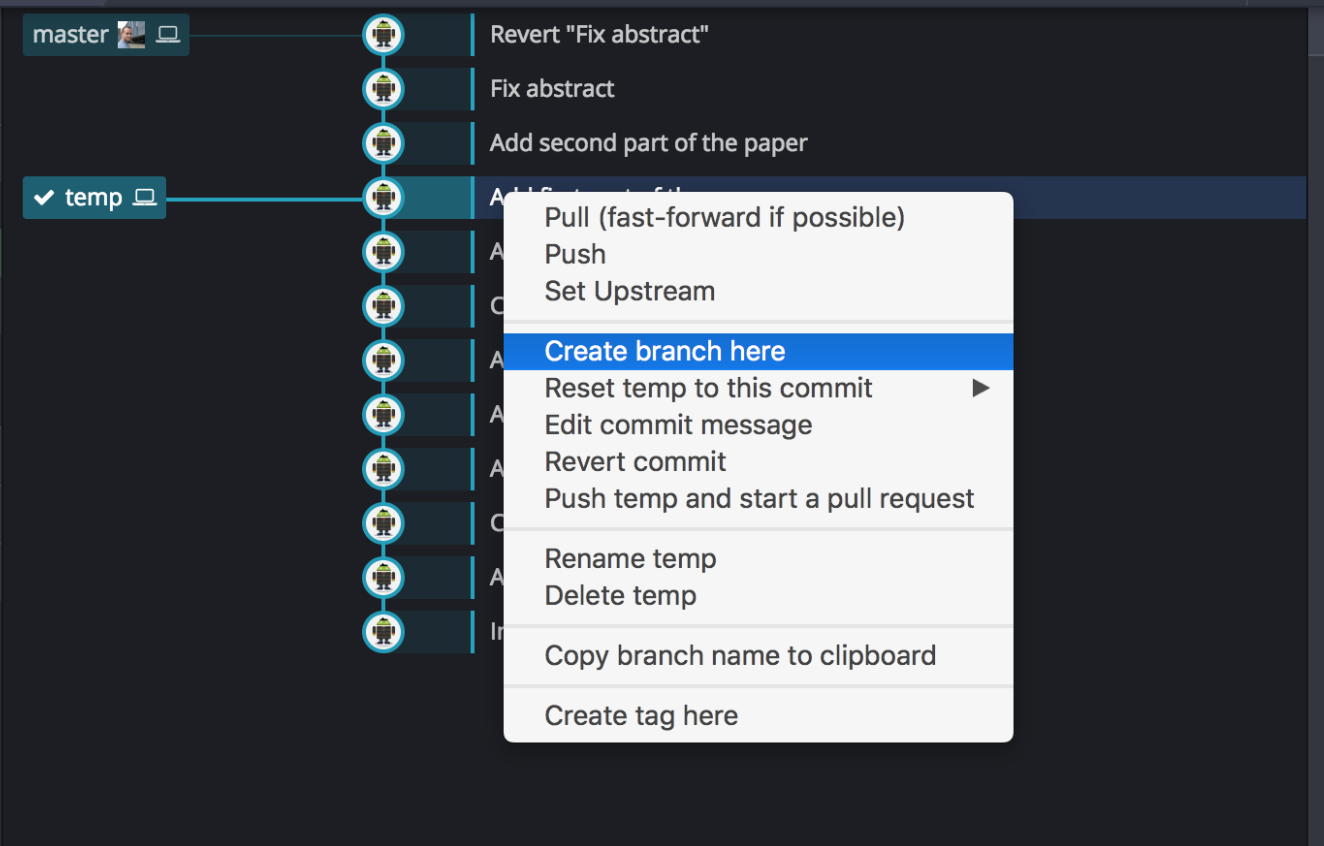
GitKraken does not support the original Git command named git checkout but thanks to creating the branch we can move to the past when needed.
After executing these steps you’ll see how all the content of your repository has been updated. If you open the files you’ll see how the content is the same that we had when we wrote the selected commit.
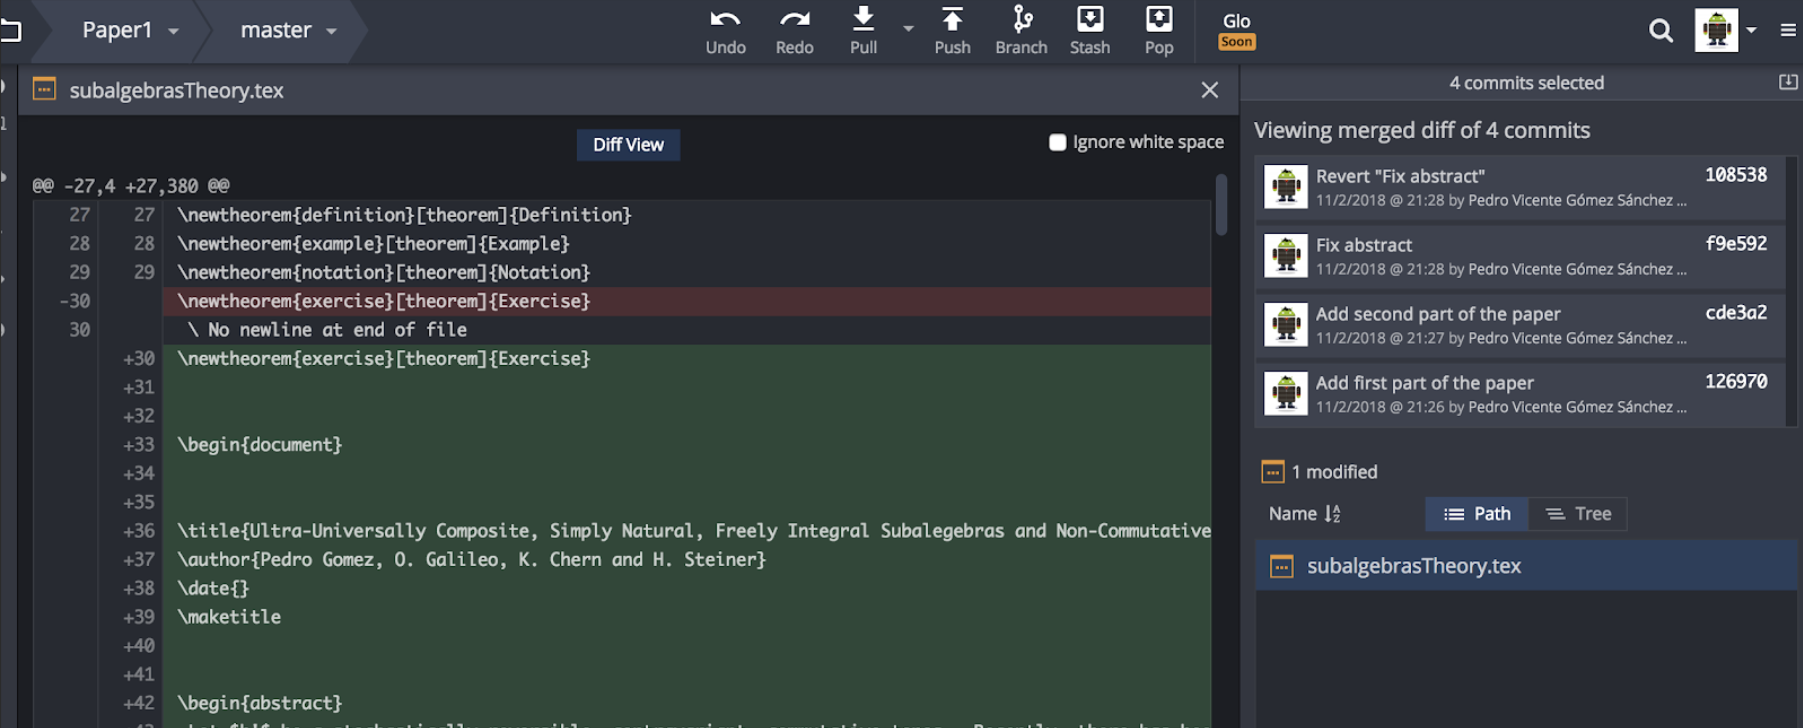
Comparing different versions
Thanks to the usage of Git and a commits history we can use GitKraken to generate a diff between any two commits. Just by selecting a bunch of them or two points in the history from GitKraken we will be able to review all the changes we’ve done in our project.

As you can see if you tap on any of the files’ changes, the content removed is shown again in red and the content added is shown highlighted in green.
Conclusions
As you can see if you followed the previous sections, using Git to keep different versions of your projects or papers is really easy. Thanks to the usage of a version control system moving around the repository history, comparing versions and saving a backup in the cloud will help us to work faster and safer. This post contains just a brief introduction, but Git will let us do many other operations like: creating branches, handing different contributors or contributing to other projects.